Search smallrig.com...


What Is A Camera Cage? Why It Should Be Your First Photography Accessory
SmallRig 2025-10-28 01:02:08
Contents
It is recommended to start with a camera cage, which is essentially a cage that surrounds your camera body. This camera cage shields your camera from bumps and offers points to attach monitors, mics, or lights. For photography and videographer categories, a camera cage is not just an add-on but at the very foundation of a professional setup.
What Is A Camera Cage and What It Does
Before we launch into why a camera cage is necessary, let's establish a clear agreement on what it even is. It may sound highfalutin, but it is essentially a clever workaround to the typical recording headaches.
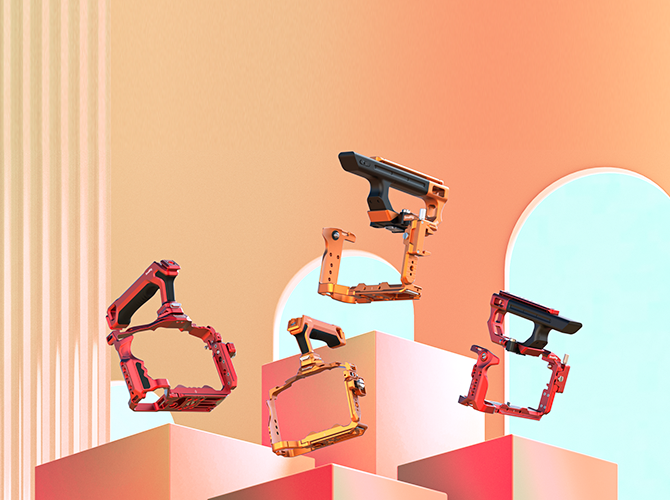
Camera Cage Structure
This is really just an external frame, usually in carbon fiber or aluminum, and it goes around your camera and clips into the base of the camera tripod. You can attach items such as lights, mics, monitors, and so on through threaded holes, and sometimes cold shoe mounts and rail mounts are even included. Most even come with a top handle, and this will make it an absolute breeze when shooting by hand.

Camera Cage Protection
Cages protect the vulnerable areas of your camera. Drop or hit it, and the cage takes the hit. For low-profile or hectic locations, it avoids scuffs and knocks and lets pros concentrate on framing.
Camera Cage Mounting Options
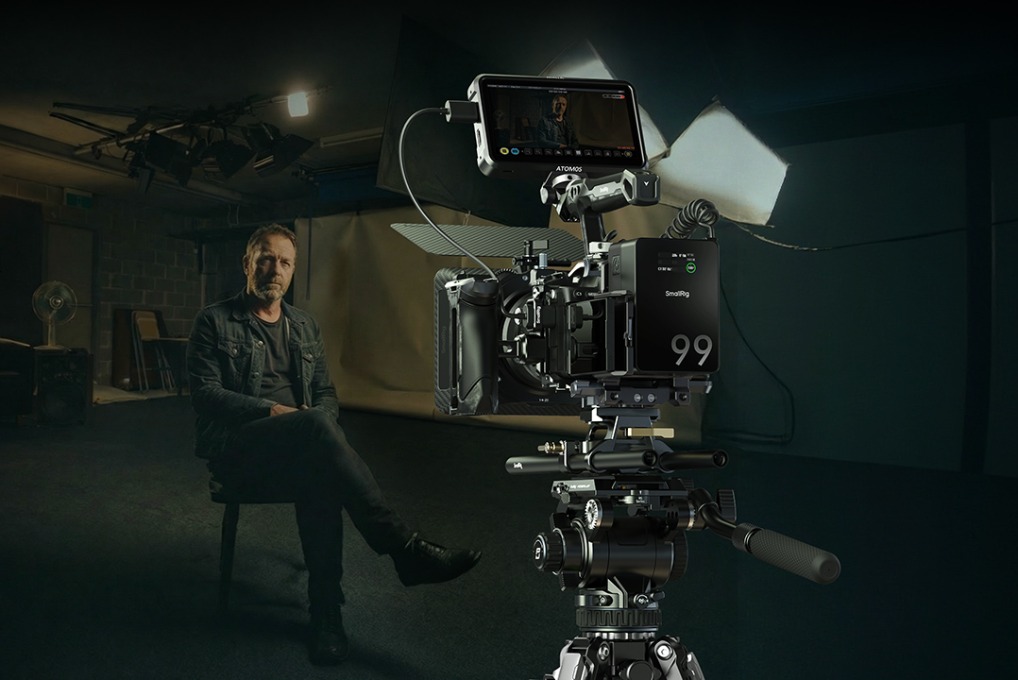
This is where cages are excellent. Camera bodies do not have many points to attach things to, but a cage has points in every direction. You are able to attach microphones, follow focus systems, and external monitors. The cage makes your setup professional and versatile, and this is something amateurs cannot do.

Why a Camera Cage Should Be Your First Accessory
With so many accessories to compete for your cash, it is really tough to know where to start. That is why experts always begin with a cage.
Shooting Stability
Shooting handheld is a real talent, but is much less exhausting if your camera feels perfectly natural in your hands. Camera bodies are light and portable in general, but then again, they often are not very comfortable to grip long term.
A cage completely alters how you grip your camera. The added bulk and grip points provide other ways to grip it securely. That top carry handle is not only great to carry it by – it provides a firm grip and truly comes in handy when shooting handheld.
The added weight may sound like it is an issue, but it is really very much an advantage in regard to stability. A slightly heavier camera eliminates minute movements and shudders, translating to steadier video even without external stabilization systems.
Protection Value
Recall that you've already spent a few hundred to several thousand dollars on your camera. It absolutely makes sense to spend an additional few hundred to bring it into balance.
Besides keeping your camera safe, a cage also helps manage heat. Many cages have ventilation gaps that help keep your camera cooler during extended recording sessions. This is especially important for modern cameras that can get too hot during long video recordings.
Expansion Investment
This is where the cage really proves its worth over time. Rather than shelling out for different mounts and adapters for every new accessory, you’ve got this universal platform that works with just about everything. Or, picking up individual mounts, adapters, and brackets for each piece you want to add. Not only is this gonna cost you more, but it ends up being a jumbled mess that's tough to balance and manage. A cage gives you a full setup that you can easily tweak to fit your needs. Building a complete camera cage rig system delivers exceptional value by maximizing both protection and creative flexibility in one comprehensive solution.
How to Choose The Right Camera Cage?
Not all cages are created equal, and the wrong choice can be worse than having none. The table below highlights the main factors to consider.
| Factor | What to Look For | Key Notes |
| Camera Model Compatibility | Choose a cage designed for your specific model. Custom cages ensure button access, proper weight distribution, and support for features like battery door access or HDMI/USB port protection. | Universal cages exist but often block flip screens or controls. Custom-fit options from brands like SmallRig are more reliable. |
| Material & Build Quality | Aluminum is the standard: lightweight, strong, and precisely machined. Carbon fiber is lighter but pricier and may wear faster under heavy use. | Inspect machining—smooth edges, clean threads, and tight tolerances are signs of quality. |
| Budget vs. Features | Entry-level cages start around $50, while pro-grade models can exceed $300. Mid-range cages (about $100–200) balance durability and expansion options. | SmallRig’s dslr camera cage models include thoughtful touches like NATO rails, cold shoes, and ARRI locating holes without premium pricing. |
By checking compatibility, build quality, and budget balance, you can choose a cage that supports your workflow today and grows with future upgrades. For most creators, a well-made mid-range cage from a trusted brand like SmallRig offers the best long-term value.
How to Install and Use a Camera Cage
To really make the most of your cage, you gotta get it sorted out right from the start. It’s pretty simple, but here are a few tips to help you do it smartly.
3 Easy Steps for Setup
-
Remove any accessories or straps from the camera. Also, remove or unmount the tripod plate since the majority of the cages attach through the tripod mount.
-
Move the cage up to your camera and make certain all mounting points are spot on. Hand-tighten the prime screw, but do not over-tighten.
-
Check all features on cameras: button presses are operational, screen flips, and turns on and off. Look at ports. Clean the lens mount before using.
4 Balance Tips
-
Place the cage on the tripod and attach accessories in sequence.
-
Observe how the balance point shifts with each addition of an accessory. Place heavy objects such as monitors or microphones in locations to balance each other.
-
If you're connecting a monitor to an upper rail, be certain to bring an upper rail base or back counterweight.
-
For handheld operation, locate the center of gravity above your points of grip to be stable.
Everyday Maintenance
-
Check mounting screws periodically since loose screws may come loose due to vibration. The cage should be cleaned periodically with a small brush or compressed air, particularly in threaded holes.
-
Keep the cage covered when it is inactive.
-
If moving, please remove weighty accessories to avoid putting strain on mounting points.
With the right setup, balance, and care, your camera cage becomes more than just protection—it transforms into a reliable platform that supports every shoot with confidence and stability.
FAQS about Camera Cage
Q1. What’s the Main Purpose of a Camera Cage?
This camera cage is really convenient for three key reasons: it takes protective care of your gear, allows you to add more gear, and is easier to maneuver. First of all, it keeps your camera away from bumps, drops, and scratches—like, really crucial when shooting in rough locations. Secondly, the cage has a ton of attachment points, so you can attach monitors, mics, lights, handles, and so forth without overstraining your camera body. Finally, it's so much easier to carry. That additional framework makes it easier to shoot steadily and hold it longer, and you can attach handles on the sides or tops to achieve greater balance. With all these benefits in mind, the cage is an absolute necessity in a pro video setup.
Q2. Do I Need a Camera-Specific Cage or Will a Universal One Work?
Universal cages are adjustable and will accommodate other camera bodies, so it's great if you switch cameras frequently. However, cages specifically designed to fit individual cameras are often the best choice. The cage fits perfectly to the body of your camera and ensures all your ports are easily accessible, all the buttons are easy to press, and the screen is easy to view. The cage will be even less loose and provide a steadier feel when holding the camera by hand to shoot. As a cage is used long term, having one designed to fit your very camera will often result in easier usage, greater comfort, and a better outcome.
Q3. Is a Cage Worth It for Beginners Just Starting Out?
For sure! Even if you’re just starting out, a DSLR camera cage can really help. At the beginner stage, it gives you some solid stability and protection, which definitely boosts your confidence while you're filming. Once you get the hang of things, the cage makes it super easy to upgrade. You can gradually add stuff like external monitors, audio recorders, LED lights, or follow-focus systems without needing to swap out everything. That option to expand makes a cage one of the best things you can buy early on if you’re serious about video making.
Use a Camera Cage Today
A camera cage is more than another piece of gear to throw into your pack—it's the foundation of your entire setup. Whether entering into your initial production or wanting to elevate the quality of your productions, a cage provides stability and safety, and a world of possibilities to add on. Don't wait; discover a cage to fit into your camera and budget today and construct a system to adapt with the evolution of your creative career.
Keep Reading
 Fujifilm X-M5, X-T50 & X-E5 Cages & Cases — SmallRig Complete Guide 2026
 How to Build the Perfect SmallRig Rig for Sony A7V
 Why Your Camera Rig Feels Loose and Wobbly
Related Products from SmallRig