Search smallrig.com...


ND vs. CPL vs. Mist: Which Phone Camera Filter Do You Really Need?
SmallRig 2025-12-22 20:21:58
Contents
The filter you need depends on what you're shooting. ND filters control bright light and create motion blur. CPL filters eliminate reflections and boost colors. Mist filters add soft, cinematic effects. Phone camera filters transform your smartphone into a professional photography tool—picking the right one makes all the difference.

What Are the Three Main Phone Camera Filters?
Let's break down each filter type so you know exactly what they do and when to use them.
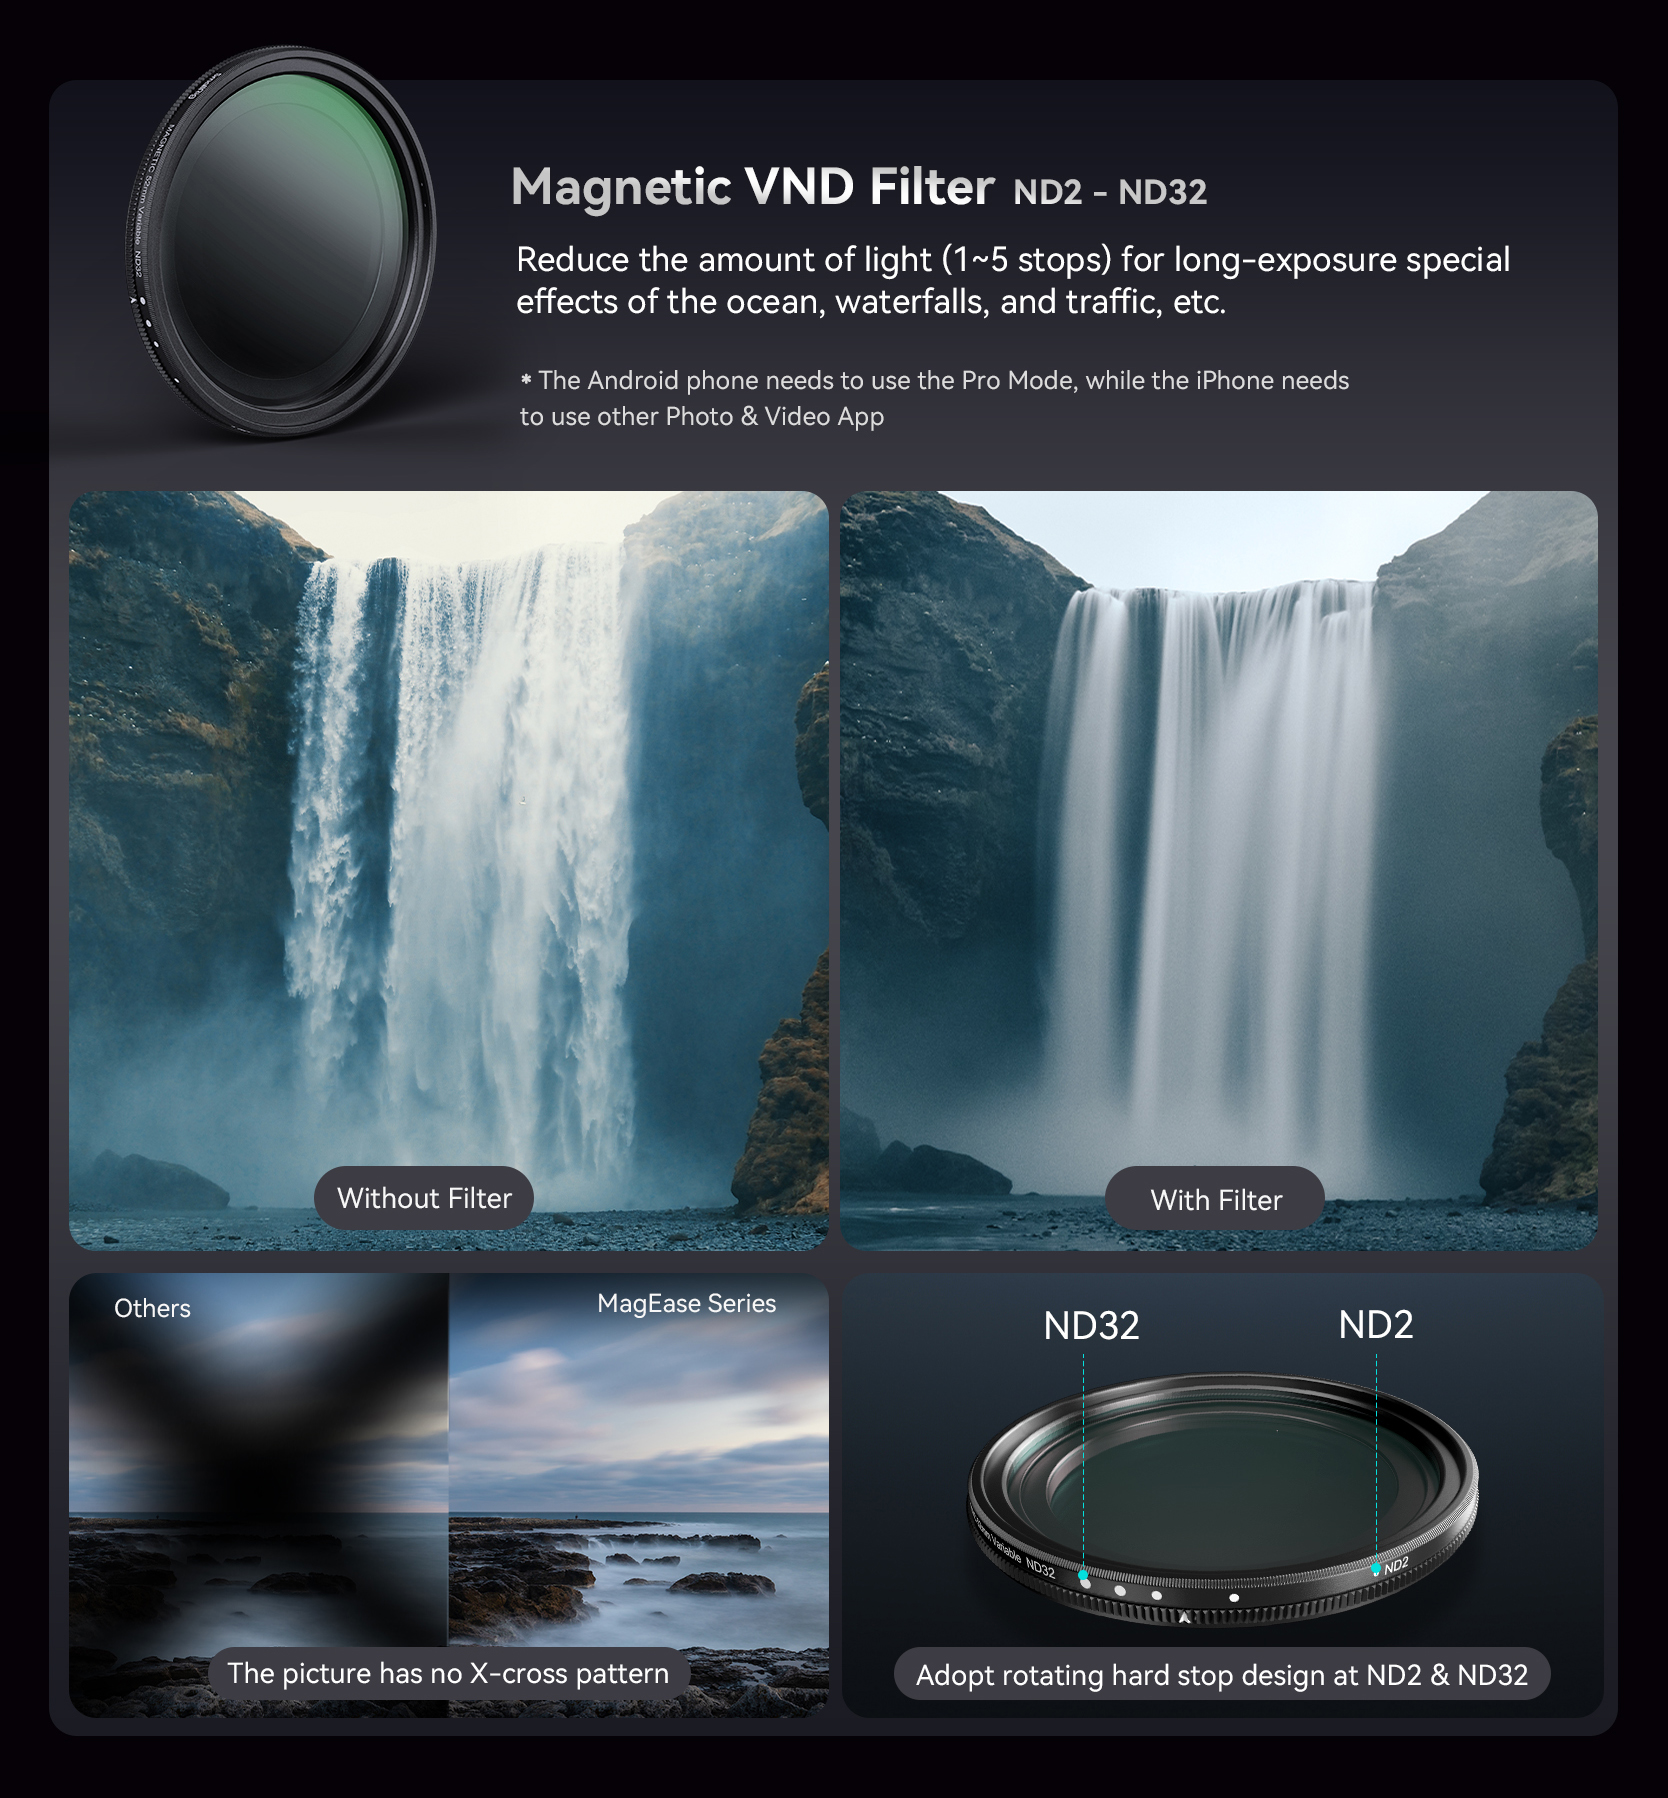
ND Filter Explained
-
What It Does: ND (Neutral Density) filters are like sunglasses for your camera. These dark glass filters reduce light entering your lens without changing colors. They come in fixed strengths (ND4, ND8, ND16) or variable types that adjust by rotating.
-
When You Need It: Bright sunny days cause problems for phone cameras—shutter speeds get too fast, making videos choppy. ND filters slow everything down. Use them for smooth waterfall shots, cinematic video motion blur, and outdoor portraits without overexposure.
-
Choosing Strength: ND4 reduces light by 2 stops—good for slightly bright conditions. ND8 (3 stops) works for typical sunny days. ND16 (4 stops) handles harsh midday sun. Start with ND8 if buying just one.
-
Pros and Cons: Total control over exposure in bright light. Downsides include a learning curve and potential color shifts with cheaper filters.
CPL Filter Explained

-
What It Does: CPL (Circular Polarizing) filters cut reflections and glare by blocking certain light waves. You rotate the filter to control the effect—watch reflections disappear and colors intensify.
-
When You Need It: Landscape photography improves dramatically with CPL filters. Washed-out skies become deep blue. Clouds pop with contrast. Shooting through glass or water? CPL removes reflections so you see underneath. It also reduces glare on leaves, making foliage more vibrant.
-
How to Use It Right: The effect works best at 90 degrees to the sun. Rotate the filter while watching your screen until you get the desired look. The effect varies as you rotate.
-
Pros and Cons: Most versatile for outdoor shooting. Reduces light by 1-2 stops, requiring slightly longer exposures.
Mist Filter Explained

-
What It Does: Mist filters create soft, glowing highlights and slightly blur fine details for a dreamy aesthetic. They come in strengths—1/8 is subtle, 1/4 is noticeable, 1/2 is heavy diffusion.
-
When You Need It: Portrait photographers love mist filters because they soften skin and create a flattering glow. Videographers use them for cinematic "vintage movie" feels. They're perfect for hiding phone camera digital sharpness. Street lights and backlit subjects look magical through mist filters.
-
Choosing Intensity: Start with 1/8 or 1/4 strength. The 1/8 adds subtle softness with beautiful night glow. The 1/4 gives obvious diffusion—great for moody content. The 1/2 is extreme for special creative projects.
-
Pros and Cons: Creates unique looks impossible to replicate digitally. Reduces overall sharpness, which isn't ideal for every situation.
Each filter serves a different purpose. Understanding these differences is key to picking the right one.
How Do These Phone Camera Filters Compare?
Now let's compare them side by side so you can see which fits your shooting style.
Direct Comparison Table
| Feature | ND Filter | CPL Filter | Mist Filter |
| Main Job | Reduces light | Kills reflections | Softens image |
| Best Scenes | Bright sun/long exposure | Landscapes/water | Portraits/video |
| Price Range | $15-50 | $20-60 | $15-45 |
| Difficulty | Easy | Medium (rotation) | Easy |
| Can Apps Replace? | No | No | Partly |
| Versatility | Medium | High | Low |
Picking by Shooting Style
-
Landscape shooters get most mileage from CPL filters—improves 80% of outdoor shots. Travel photographers should start with CPL for handling window reflections, water, and incredible skies.
-
Portrait and content creators benefit most from mist filters, especially for video. The softening effect makes people look their best.
-
Video shooters need ND filters first. Proper motion blur requires controlling light, which ND filters handle perfectly.
Budget Strategy
Don't buy all three at once. A quality CPL filter ($30-40) covers most situations. Add an ND filter if you shoot lots of video. Save mist filters for when you want creative effects.
Stacking Multiple Filters
You can stack filters, but be careful. CPL + ND works fine. Avoid stacking more than two—you'll get vignetting (dark corners) and quality loss.
The CPL wins for versatility, but your actual needs should drive the decision.
How Do You Install a Filter for a Phone Camera?
Getting filters onto your phone requires the right mounting system and a bit of careful setup. The goal is to keep the filter perfectly aligned with your main camera lens so you avoid vignetting, blur, or strange reflections.
Mounting Methods
Clip-on systems are the cheapest and easiest, but can shift around if you bump the phone or put it back in your pocket. They’re fine for casual use, but you need to double-check alignment every time you shoot.
Magnetic mounts snap on securely and make swapping filters fast, but they require a thin metal or magnetic ring on your phone or case. Make sure that the ring doesn’t cover any lens or sensor.

Thread adapters screw into special cases or cages. This is the most professional option, since you can use true 52mm or 67mm filters, but it means committing to a dedicated case or rig, for example, pairing your phone with a SmallRig mobile video cage that has standard threaded mounts built in.
What Phone Cages Bring to the Setup
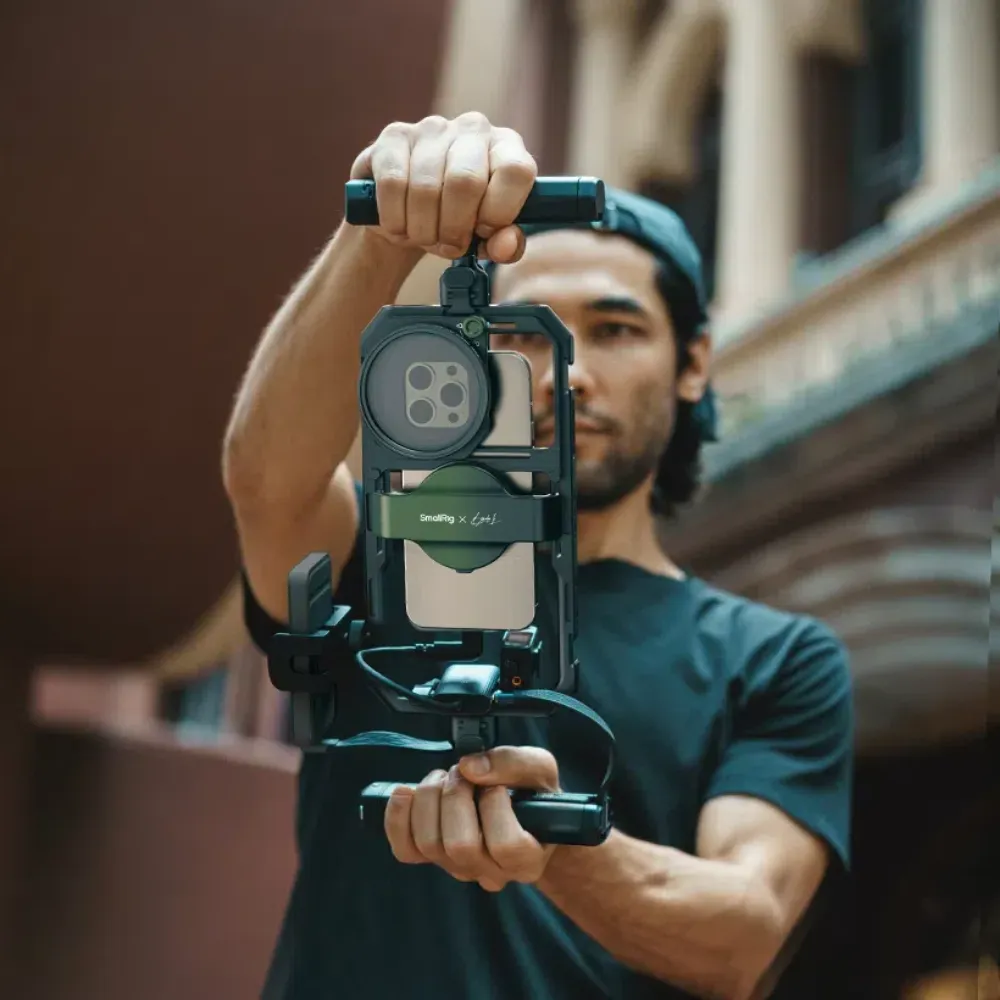
Phone cages are metal frames surrounding your device, adding mounting points for filters, mics, lights, and handles. They provide better grip, protect your phone in daily shooting, and give proper threaded filter mounts that won’t twist out of place. Budget cages ($20–40) already work fine for casual video and travel. Professional rigs ($60–150) add cold shoes, multiple 1/4"-20 threads, and stronger build quality. SmallRig’s mobile video cage systems for iPhone and Android are a good example, combining protection, threaded filter mounts, and multiple accessory points in one rig, so you can treat your phone more like a compact cinema camera.
Setup Tips
Align filters carefully to avoid dark edges or uneven exposure. Always clean both the phone lens and filter glass before attaching—fingerprints show up fast on ultra-wide cameras. Tighten clips or mounts just enough so they don’t move, but not so much that you scratch the case. Keep filters in a small pouch or hard case for daily carry instead of leaving them mounted permanently, which also protects your phone if it drops.
Which Phone Camera Filter Do You Actually Need?
Here’s how to make the smart buying decision instead of grabbing a random kit.
Decision Framework
Think about your last 20 photos. What problems did you face? Washed-out skies and window glare? Get a CPL. Bright sun making exposure impossible, or the video too choppy? Grab an ND. Want softer, more cinematic looks and gentler highlights on skin? Try a mist filter.
Starting Point for Beginners
The CPL filter is the best first purchase for about 70% of phone photographers. It cuts reflections on water, glass, cars, and wet streets, and it deepens skies and foliage. That makes travel, landscapes, city walks, and everyday outdoor shots look cleaner and more intentional without any editing skills.
Building Your Kit
Once you’ve mastered one filter and keep bumping into specific limits it can’t solve—like needing motion blur for waterfalls or smoother video shutter—you can add ND filters, then maybe a mist filter for creative looks. Buy quality over quantity: one well-made filter with good coatings beats three cheap ones that add haze, color shifts, or flares you don’t want.
FAQ
Q1. Do Phone Filters Work with All Phone Models and Lens Configurations?
Most filters work with single-lens phones or the main wide lens on multi-camera phones. However, ultra-wide and telephoto lenses cause problems—filters designed for the main lens create severe vignetting on ultra-wide lenses due to their wider field of view. Some manufacturers make filter systems specifically for ultra-wide lenses with larger diameter glass. If you primarily shoot with ultra-wide, check compatibility before buying. Triple or quad-camera phones are trickier since filters typically only cover one lens at a time, so you can't use multiple lenses simultaneously when a filter is attached.
Q2. How Do You Clean and Store Phone Camera Filters Properly?
Clean filters like you'd clean glasses—use a microfiber cloth and lens cleaning solution, never paper towels or shirt fabric, which scratches glass. Blow off loose dust first with a rocket blower before wiping to avoid grinding particles into coatings. For stubborn smudges, breathe on the glass to fog it, then wipe gently in circular motions. Store filters in protective cases or pouches—never throw them loose in a bag where they'll scratch. Keep them away from extreme heat (like car dashboards in summer), which can damage coatings. Check filters before each shoot for dust, fingerprints, or coating damage that degrades image quality.
Q3. Can You Rent Phone Camera Filters Before Buying?
Very few camera rental services stock phone-specific filters since they're relatively inexpensive compared to traditional camera gear. However, some photography stores offer demo units you can test in-store. A better strategy is buying from retailers with good return policies—order a filter, test it for a week with your actual shooting style, and return it if it doesn't meet your needs. Many online photography communities also organize local gear swaps where you can borrow filters from other mobile photographers. Given that quality filters cost $25-40, buying one to test is often cheaper than renting traditional camera filters, which can cost $15-30 per day.
Conclusion
ND filters control bright light, CPL filters eliminate reflections and boost colors, and mist filters create soft cinematic effects. Most people should start with a CPL for versatility. Build your collection based on what you actually shoot. Grab a quality filter that solves your biggest challenge and start shooting better photos today, and when you’re ready to rig up, pair it with a SmallRig phone cage so your filters, lights, and mics all have a solid, reliable mount.
Keep Reading
 Easy Guide to Installing the Adjustable Clamp Matte Box & Filter Kit
 4402B Remote Control Indicator Light Not On - Troubleshooting Steps
 Elevate Your Live Streaming with the SmallRig Encore PT60 Stabilizer 4668
Related Products from SmallRig