Search smallrig.com...


Mastering Soft Light: How to Use Softboxes Effectively
SmallRig 2026-01-08 03:07:09
Contents
Using softboxes effectively comes down to three things: picking the right size, placing it at the correct distance and angle, and adjusting the power to create that beautiful, wrap-around light that makes portraits pop. A softbox is your best friend for creating professional-looking photos because it turns harsh light into something flattering and natural. Let's break down exactly how to make the most of your softbox lighting setup.
How Do You Choose the Right Photography Softbox?
Getting the right softbox makes all the difference. Walk into any camera store, and you'll see dozens of options. Here's what actually matters.
Softbox Size and Shape Selection Guide

Size isn't just about bigger being better. For headshots, a 24x36-inch softbox works great. Full-body portraits? You'll want something around 36x48 inches or larger. The rule is simple: the bigger your softbox relative to your subject, the softer your light becomes. Think of it like a window—a small window creates harder shadows, while a wall of windows floods everything with gentle light.
Square Softbox vs. Octagonal Softbox Comparison


Square softboxes are workhorses. They're straightforward, pack flat, and give you nice, even light. Octagonal softboxes (or "octas") are the portrait photographer's secret weapon. Their round shape creates natural-looking catchlights in your subject's eyes—those little reflections that make eyes sparkle. Octas also wrap light around faces more naturally. If you shoot people mostly, go octagonal. For products or versatility, stick with square.
Strip Softbox Special Uses
Strip softboxes are long and narrow, usually around 12x36 inches. These are perfect for rim lighting—that gorgeous edge light that separates your subject from the background. Hair stylists love them because they create beautiful highlights in hair without spilling light everywhere. They're also fantastic for full-length portraits where you need even coverage from head to toe.
Softbox Lighting Kit Quality Points
Not all softbox kits are created equal. Check the diffusion fabric—it should be thick enough that you can't easily see through it when the light's off. The frame should lock securely without wobbling. Cheaper softboxes use thin rods that bend or break. Look for sturdy construction with metal speed rings. A decent softbox lighting kit includes the softbox, mounting bracket, and at least one inner and outer diffusion panel.

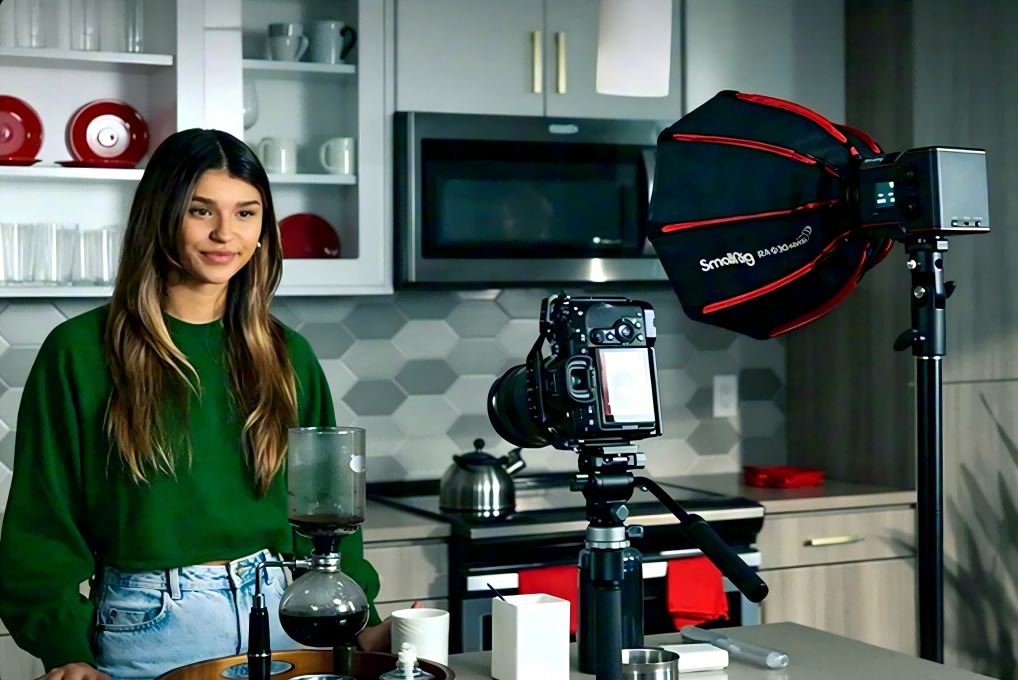
If you want something that works straight out of the box, SmallRig’s softbox studio lighting kits bundle a Bowens-mount COB light, matching softbox, and stand so you can build a consistent, repeatable look without mixing random pieces from different brands.
How Should You Position Softbox Light for Portrait Lighting?
Placement is where the magic happens. You can have the best softbox in the world, but put it in the wrong spot, and your photos will fall flat.

Optimal Distance Between Softbox and Subject
Here's the deal: move your softbox closer, and the light gets softer. Pull it back, and it gets harder. For portraits, start with your softbox about 3-4 feet from your subject. That's roughly arm's length plus a bit. Too close, and you'll get hotspots and uneven lighting. Too far, and you lose that creamy softness. Watch your subject's face—the light should wrap gently around their features without harsh shadows under the nose or chin.
The 45-Degree Lighting Rule
Height matters more than most people think. For flattering portrait lighting, position your softbox slightly above your subject's eye level so the light is coming from a bit higher than their face instead of straight on. Point it down at a gentle downward angle rather than aiming it flat at them. This mimics natural light from above and creates a small, natural shadow under the nose. Too low, and you get spooky under-lighting. Too high, and the shadows get too deep under the eyes.
Softbox Height Adjustment Techniques
Height matters more than most people think. For flattering portrait lighting, position your softbox slightly above your subject's eye level—maybe 6-12 inches higher. Point it down at about a 30-degree angle. This mimics natural light from above and creates a small, natural shadow under the nose. Too low, and you get spooky under-lighting. Too high, and the shadows get too deep under the eyes.
Feathering Method to Control Light Spread
Feathering is a pro technique that instantly levels up your softbox photography. Instead of pointing your softbox directly at your subject, aim it slightly past them. You're using the edge of the light rather than the center. This gives you softer, more even illumination and prevents hotspots. It's especially useful when you're working closely with a large softbox. The light becomes more directional and controllable.
What Are the Classic Portrait Lighting Patterns with Softbox?
These four lighting patterns are the foundation of professional portrait work. Master these, and you can handle almost any portrait situation.
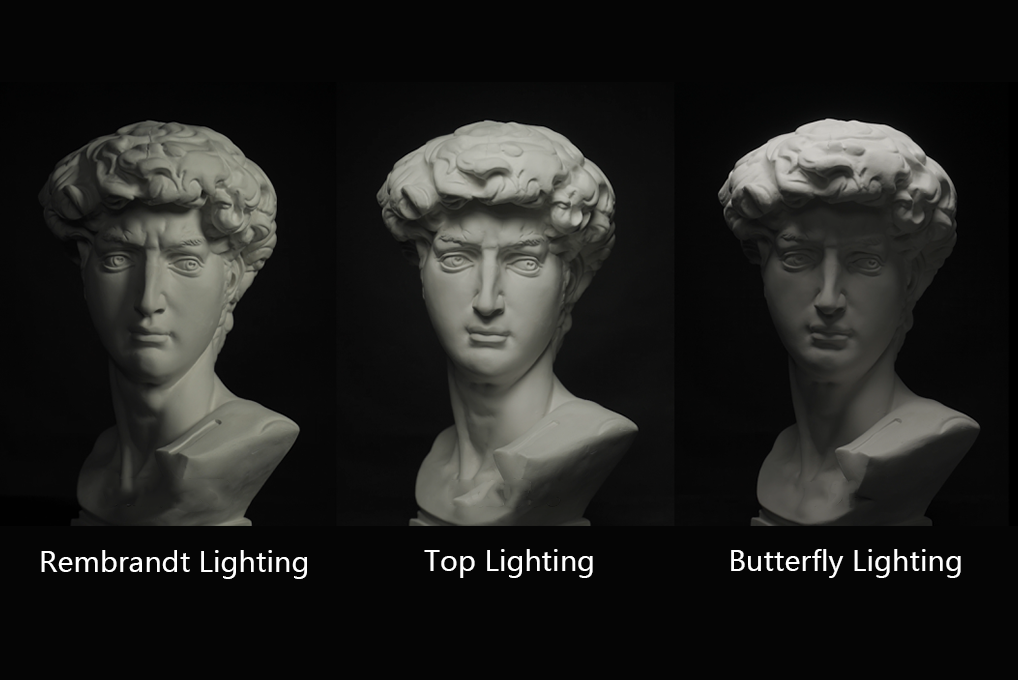
Rembrandt Lighting Setup
Named after the painter, Rembrandt lighting creates a small triangle of light on the shadowed side of the face, just below the eye. Position your softbox at roughly 45 degrees to your subject, raising it so it's above eye level and angled slightly down toward the face instead of pointing straight in. The key is that triangle. It adds drama and dimension without being too dark. This pattern works great for character portraits and adds a timeless, classical feel.
Loop Lighting Configuration
Loop lighting is probably the most universally flattering pattern. Place your softbox slightly to one side and raised just a bit. You'll see a small shadow from the nose that loops down toward the corner of the mouth—but doesn't touch it. That's your target. This setup works for almost everyone and creates gentle modeling without heavy drama.
Butterfly Lighting for Portraits
Also called "paramount lighting," the butterfly creates a small shadow directly under the nose that looks like a butterfly. Position your softbox light directly in front of your subject, raised high and angled down. This pattern is gorgeous for beauty work and glamour shots because it emphasizes cheekbones and creates a slimming effect. It's less forgiving on older subjects because it can emphasize wrinkles, but for fashion and beauty, it's gold.
Split Lighting Dramatic Effect
Split lighting does exactly what it sounds like—it splits the face in half, with one side lit and the other in shadow. Position your softbox 90 degrees to your subject, at their face level. This creates serious drama and works great for mood portraits, musicians, or artistic shots. It's bold and not for everyday use, but when you want impact, split lighting delivers.
How Can You Create Different Effects with Softbox Photography?
Once you've got the basics down, these techniques let you fine-tune your softbox lighting for specific looks.
Flexible Use of Inner and Outer Diffusion Panels
Most softboxes come with two layers of diffusion. The inner baffle and the outer front panel. Using both gives you the softest light. Remove the front panel for slightly harder, more defined shadows—useful when you want more texture or when shooting products. Some photographers even use just the inner baffle for a semi-soft look that's not quite hard light but has more punch than full diffusion.
Adding Grids to Enhance Softbox Light Control
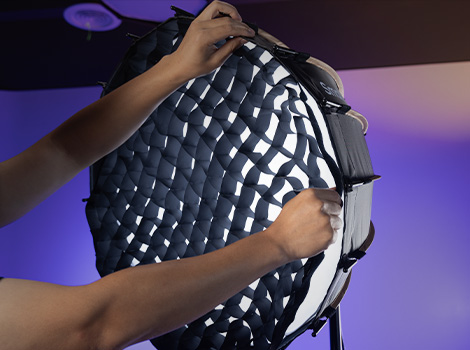
Grids (also called "eggcrates") attach to the front of your softbox and narrow the spread of light. They're made of fabric honeycombs that channel light straight forward while blocking it from spilling to the sides. This is incredibly useful for separating your subject from the background or when working in tight spaces. The light stays soft but becomes directional. Think of it as soft light with focus.
Many SmallRig softboxes can be combined with fabric grids, so you can quickly swap between a wide, flattering wash for groups and a tight, contrasty beam for dramatic headshots without rebuilding your whole lighting setup.
Multiple Softbox Combination Applications
Two or three softboxes give you incredible control. A classic setup uses one large softbox as your main light and a second smaller one as fill to lighten shadows. Add a third as a hair or rim light from behind. The key is making sure your lights have different purposes—avoid creating multiple competing shadows. Your main softbox should be the brightest, with others at lower power supporting it.
Softbox and Reflector Pairing Techniques
Reflectors are the budget-friendly way to add fill light. Place a white or silver reflector opposite your softbox to bounce light back into shadow areas. This opens up shadows without adding another light source. Silver reflectors give brighter, more specular fill. White provides a gentler, more natural fill. Gold adds warmth—great for sunset-style looks. A reflector plus one softbox gets you surprisingly far.
FAQ
Q1. What’s the Real Difference Between Continuous Light and Flash in a Softbox Light Setup?
Continuous lights let you see exactly what you're getting before you shoot, which is perfect if you're learning or shooting video. Flash gives you more power and doesn't heat up your studio or drain batteries as fast. For photography, flash typically wins because you can overpower ambient light and freeze motion. But if you're doing both photo and video, or you want to learn lighting without guessing, continuous light in your softbox lighting kit makes the learning curve way easier. Modern LED continuous lights are bright enough for most portrait work now, though they still can't match flash for raw power.
Q2. Can You Use Just One Softbox and Still Get Professional Portrait Lighting Results?
Absolutely, and honestly, it's the best way to learn. Professional photographers shoot with single-light setups all the time. The trick is using your environment—find a white wall or ceiling to bounce light for natural fill, or grab a reflector to control shadows. One well-placed softbox teaches you more about light than three poorly-placed ones. Start with a single medium or large softbox, learn to move it around your subject, and you'll be amazed at the variety of looks you can create.
Q3. How Do You Know if You Need to Upgrade Your Softbox Lighting Kit?
Your basic softbox kit needs upgrading when it's holding you back, not just because something shinier exists. Signs you've outgrown your gear: your diffusion fabric is yellowing or torn (affecting color and light quality), the frame doesn't hold shape anymore, or you're consistently limited by size. If you're shooting full-length fashion and struggling with coverage from a 24-inch softbox, that's a legitimate upgrade. But if your current softbox produces the light quality you need, there's no rush—spend money on skills and practice instead.
Conclusion
Ready to transform your portrait photography? Grab a softbox lighting kit, pick one of these lighting patterns, and start shooting. The difference between knowing this stuff and actually doing it is practice. Set up your softbox, photograph a friend, and watch how moving that light just a foot changes everything. That's where real learning happens—behind the camera, not reading articles.
If you’re looking for gear that will grow with you, check out SmallRig’s lineup of COB lights, parabolic softboxes, and air-cushioned stands so your lighting stays consistent while you focus on posing, expression, and storytelling.
Keep Reading
 Best Portable Lighting Setup for Solo Content Creators
 Review: SmallRig RF 20C Portable Zoom Light
 Why You Need a Video Light: A Complete Guide for Content Creators
Related Products from SmallRig