Search smallrig.com...


Post-Rain Spring Flower Photography Guide: Tips for Stunning Shots
SmallRig 2026-04-07 00:10:35
Shooting spring flowers after rain is one of the best ways to capture high-quality floral photos. The diffused light and water droplets on petals add texture and depth to your shots. In this guide, I’ll share practical, experience-based tips and essential gear recommendations to help you take stunning post-rain flower photos efficiently and avoid common mistakes.
Key Advantage: Make the Most of Post-Rain Diffused Light
The biggest benefit of shooting spring flowers after rain is the diffused light. Cloudy skies act as a natural softbox, eliminating harsh shadows and overexposed highlights, which makes petal colors more vibrant and textures clearer—this is why many professional photographers prefer shooting after rain. Unlike sunny days where you have to chase the golden hour, post-rain light remains consistent from sunrise to sunset. You can use a large aperture directly without worrying about shadows ruining details, saving time and improving shooting efficiency. In practice, focus on backlighting: let light pass through wet petals to clearly show their veins and add depth to your images. There’s no need to pursue complex lighting; making good use of natural diffused light is the best choice.
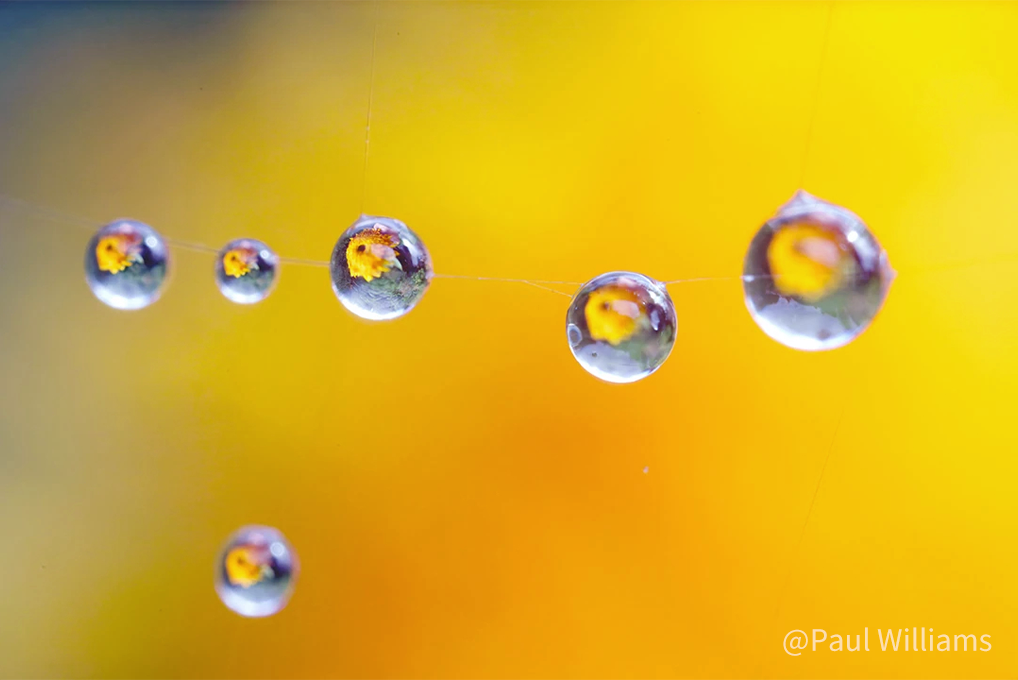
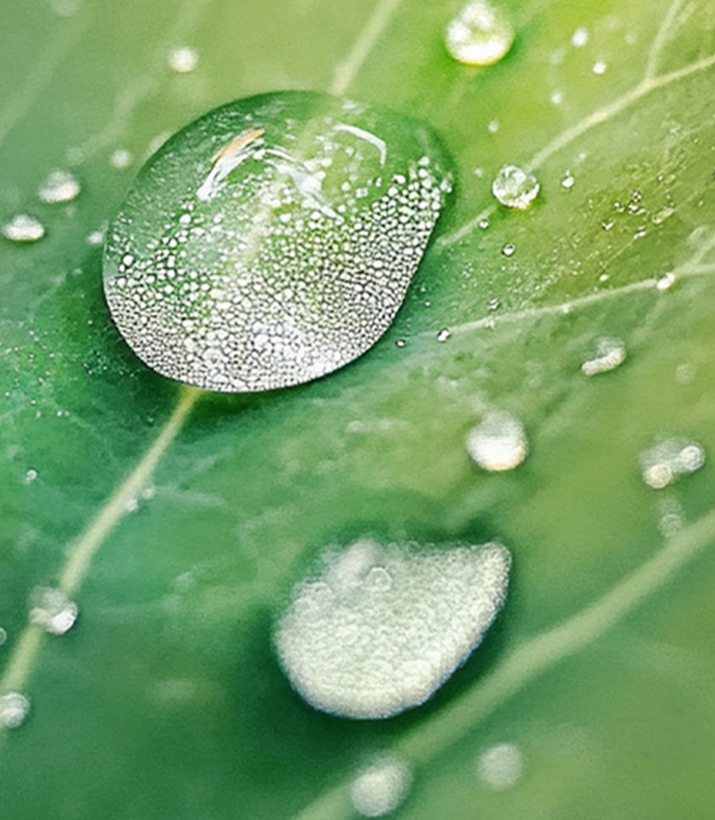
Practical Tip: Shoot Water Droplets for Standout Shots
Water droplets are the core element of post-rain spring flower photography. Mastering the right shooting methods can make your photos more striking. Use a macro lens or your phone’s macro mode to capture close-up details of water droplets. A 1:1 macro lens can clearly show the reflection of the garden inside each droplet, creating a "flower within a flower" effect. When shooting, use a tripod to keep stable and focus patiently on the center of the droplet to avoid blurriness. For a dreamy effect, use a large aperture (f/1.8–f/2.8) to slightly blur background droplets and create bokeh. If there’s a light breeze, adjust your shutter speed as needed: a shutter speed of 1/250s or faster freezes the movement of rolling droplets, while a slower shutter creates a smooth, flowing effect. Additionally, adjust your position to let light enter the droplets from behind, creating obvious bright highlights and enhancing image texture. Don’t strive for full sharpness; moderate blurriness in macro shots adds artistic appeal.
Critical Point: Control Exposure to Avoid Ruined Shots
Exposure control is crucial when shooting after rain. Wet petals reflect more light, which can easily cause overexposed highlights, flat shadows, or metering errors that affect image quality. In practice, reduce exposure compensation by 1/3–2/3 stops. Use spot metering to measure the brightest area of the flower where you want to retain details, then underexpose slightly to prevent highlights from becoming pure white and losing detail. If petal surfaces have strong reflections, use a polarizing filter to reduce glare and deepen the saturation of background colors, making the subject stand out. There’s no need to overcomplicate metering modes: use spot metering for single flower close-ups and evaluative metering for full garden scenes. After shooting, check the histogram to verify exposure and adjust parameters promptly.
Composition Tip: Keep It Simple, Highlight the Subject
Composition doesn’t need complex techniques; the core is to highlight the subject, create layers, and avoid clutter. Use negative space: leave some blank space in the direction the flower is facing, or use a telephoto lens to compress space and blur the background, making the subject more prominent. You can also create simple layers: use slightly blurred branches and leaves as the foreground, focus sharply on the main flower in the middle, and keep a few environmental elements in the background to enhance depth. At the same time, pay attention to the natural geometric structure of flowers: shoot radially symmetric flowers from above, or use the rule of thirds to position the subject off-center. There’s no need to force creativity; a simple, clear composition better highlights the texture of post-rain spring flowers, avoiding clutter from too many elements.
Gear Recommendation: Macro Photo LED Light (Essential for Beginners)
You don’t need complex gear for post-rain flower photography— the key recommendation is a macro fill light, an essential tool for this type of shooting. Post-rain light is soft, and when shooting close-up details of water droplets or petals, shadows can easily appear dark. A macro fill light provides precise lighting to brighten the image, highlight the details of water droplets and petals, and avoid reflections caused by direct strong light. Whether you’re using a professional camera or a phone, pairing it with a small macro fill light can significantly improve image quality. There’s no need for additional accessories like tripods or reflectors, simplifying gear carrying and making it more suitable for daily outdoor shooting.
Experience Summary: Embrace Post-Rain Conditions, Prioritize Practicality
Here’s a key piece of advice: many beginners wait for sunny days to shoot spring flowers, but the unique post-rain environment actually allows you to take one-of-a-kind photos. Post-rain water droplets and diffused light are natural creative elements—don’t be afraid of damp conditions. Simply protect your gear (e.g., use a plastic bag with a hole for the lens) and you’re good to go. There’s no need to chase "perfect weather"; embrace post-rain shooting conditions, focus on core techniques, and you’ll take high-quality floral photos. Remember, practical shooting methods are more important than complex gear or fancy composition.
Keep Reading
 Best Portable Lighting Setup for Solo Content Creators
 From Bare Phone to Pro Rig: The Complete Setup Guide for SmallRig × Brandon Li
 Best Travel Tripods 2026: Carbon Fiber vs Aluminum — Which Should You Choose?
Related Products from SmallRig